Step 1
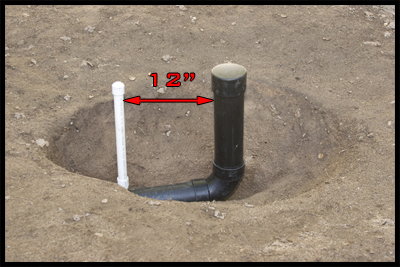
At the lowest point of the pond, stub up a 3 inch bottom drain and cap it off. If you are using the Advantage Bottom Drain Cover with built in Air Diffuser, you will need to install an air line. To do this, place a 3/4 inch PVC pipe for air exactly 12 inches away from the edge of the bottom drain pipe. Clean out dirt from around pipes for cement. Cap the air line and then pressure test all lines.
Step 2
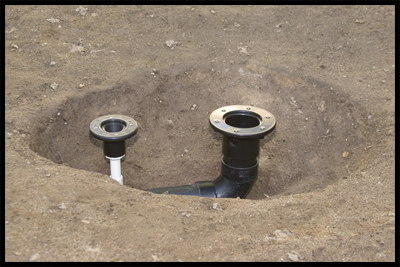
Pre assemble both the 3 inch bulkhead flange, as well as the 1 1/2 flange by screwing the top flanges onto their bases. Do not tighten with a drill gun. Always only hand tighten all plastic bulkheads to prevent stripping the plastic threads. After pipes have been pressure tested, cut both pipes and cement on both bulkhead flanges. Flanges should be installed approximately 1/2 inch below the rim of the dirt hole.
Step 3

When cementing both bulkheads on to the pipes, align screw in a straight line. This will make locating the screw holes easier to find later when screwing the top plate down through the liner.
Step 4
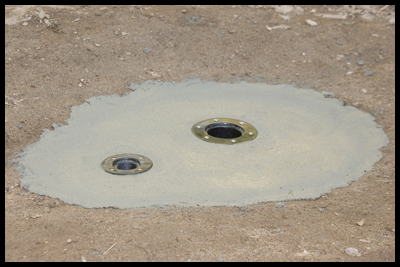
Add cement to hole around drain. Carefully float cement up to top of bulkhead flanges. Be careful not to get cement into screw slots. The final contour of the cement should be even with the top of the bulkheads and flat across the whole cemented area.
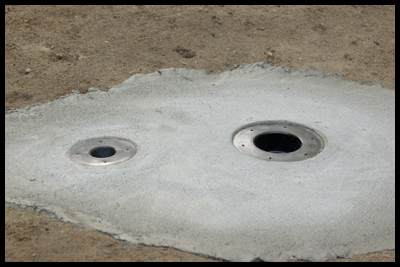
Step 5

After the cement dries, use a screw driver to remove the cement right up against both of the bulkheads. This should allow a smooth transition of the rubber liner from the cement surface to under the flange covers on the bulkheads.
Step 6
Remove top flanges and sweep area clean.
Step 7
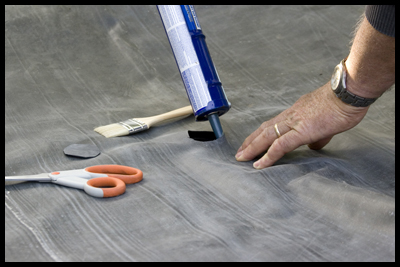
Place liner in pond. Make sure liner is properly aligned so that the liner extends over all the outer edges of the pond.Then cut a 2 inch hole in the liner over the bottom drain opening only. Use a small paint brush to reach through thehole in the liner and brush away any debris that might have collected on top of the bulkhead flange.
Step 8
Place a bead of 100% silicone caulk on the face of the flange under the liner and then gently press the liner down against the flange.
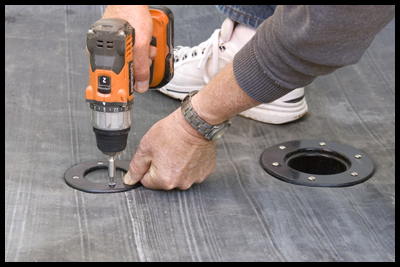
Step 9
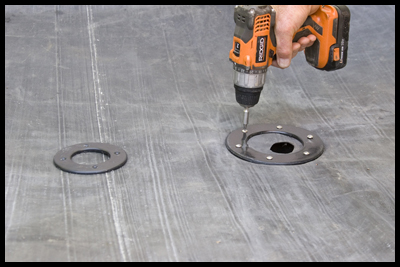
Install the top flange in place over the bottom drain hole by aligning the flange with the center opening of the bulkhead. If you followed step 3 when cementing on bulkheads, align the holes in the top flange in a straight line with theair line pipe opening. There is no need to place silicone on the surface of the top flange cover when installing it. Gently install the self-tapping screws with a screw gun but do not tighten screws with the screw gun.
Step 10
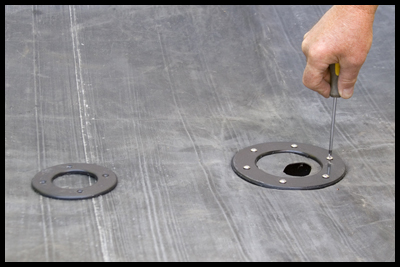
After all screws are installed in the flange then hand tighteneach screw.
Step 11
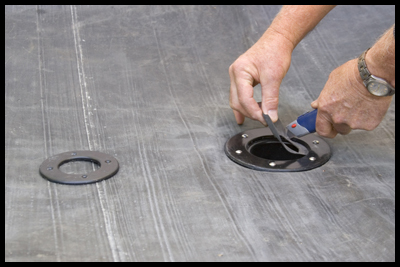
Cut liner away from inside bulkhead.
Step 12
Repeat steps 7 through 11 for the smaller air supply line. Notice, in step 7 cut a 1 inch hole in the liner instead of a 2 inch hole.
Step 13
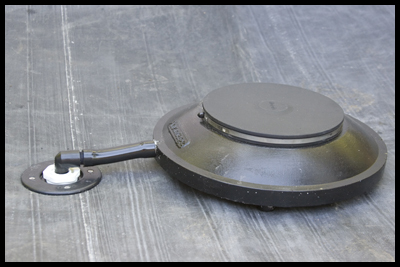
After both bulkheads are installed, screw the 1 1/2 inch to 1/2 inch reducer bushing into the air supply bulkhead. Then screw the 1/2 inch black street elbow into the reducer bushing. Make sure to Teflon tape both joints. Both these fittings come with the Advantage Air Supply Bulkhead Assembly. Next, cut the black flex hose, included in the kit, to the right length to allow the bottom drain to be installed directly over the bottom drain opening. Finally, use PVC cement to glue both ends of the black flex hose in place between the air supply opening and the bottom drain cover pipe.
Note: Heating the black flex hose with a hair dryer will soften the hose enough to make it easier to install. The rubber hose should be glued with PVC cement.
Step 14
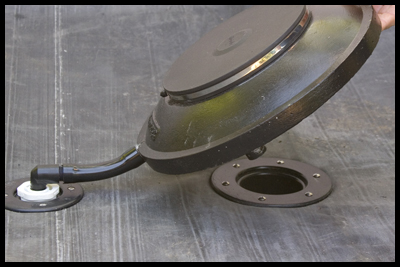
Once the PVC cement dries, you will have the ability to lift the drain cover up or slide it to the side with a pool net. This is helpful if any debris were to get caught under the drain cover.
This is a real advantage over conventional pond drain covers. With most others you would need to get into the pond to physically remove the drain cover, clear out any debris, and then reinstall the cover.
Related Pages
Custom Koi Pond Design