Installation Instructions
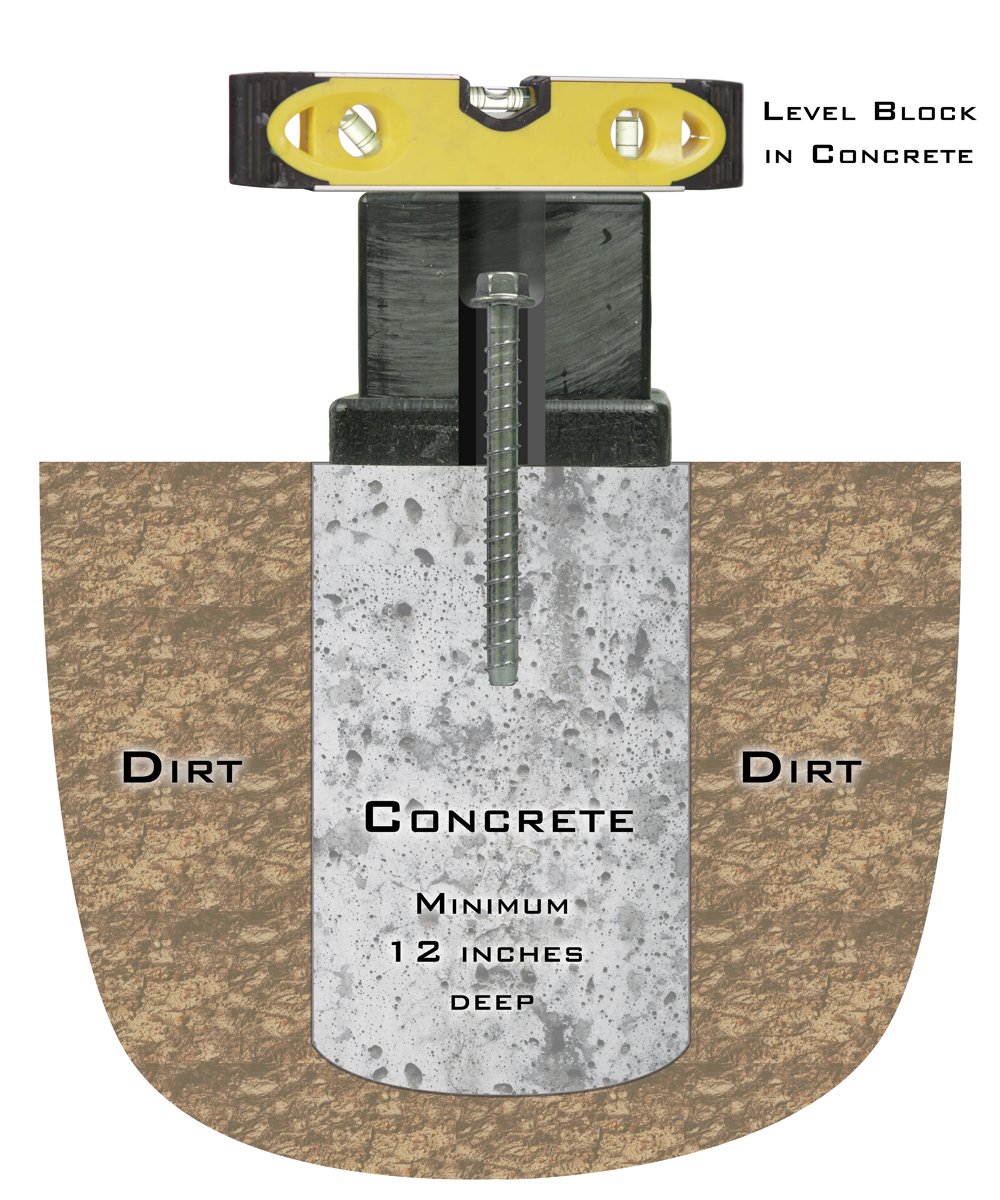
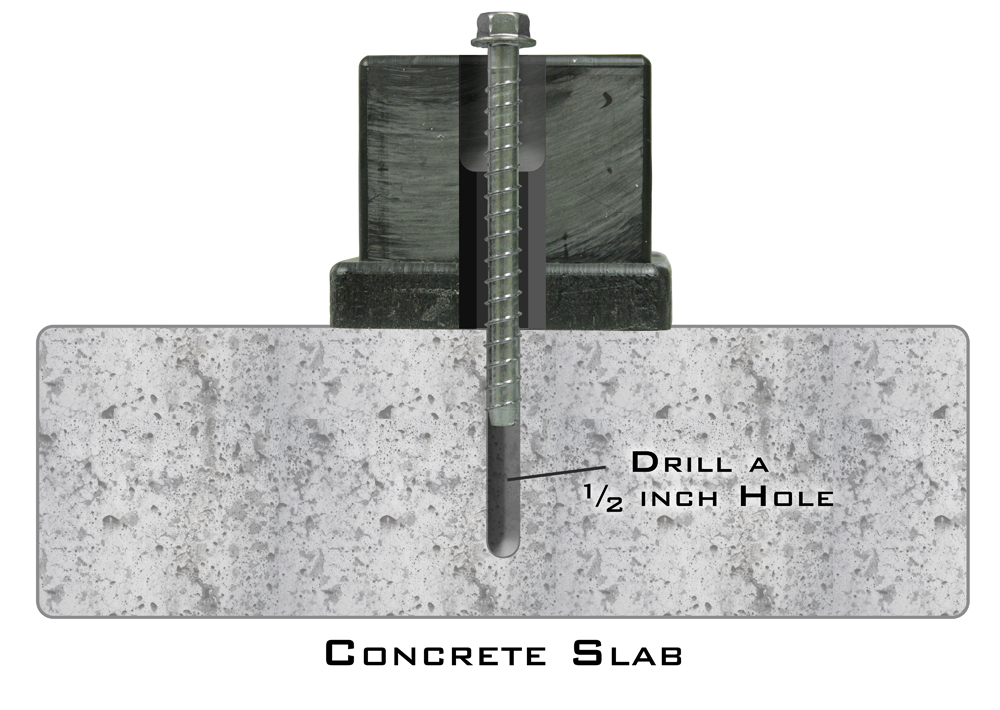
1. You will need to mount the GROW Tower. To do this choose a place close to the output pipe of your filter. If this is on a concrete pad you can drill a 1/2″ hole in the concrete and using the provided molly bolt, anchor the mounting block to the concrete (see attached image below). If this area is in the dirt you will need to dig a hole and pour concrete in it and mount the Tower in the wet concrete using the extension bolt included (see attached image below).
2. Once the Tower is mounted you will need to install the 2″ three way valve, included with the system, into the return line leading from your filter back to the pond. To operate this system properly you will need at least 4 psi of water pressure coming from that pipe. You can increase the pressure to the GROW System by slowly reducing the flow through closing the three way valve. Caution – This may slow down the flow of water back to the pond to an unacceptable level.
3. If you have at least 4 psi of pressure at that point than you can connect the 3/4″ black hose directly from the gray barbed fitting on the three way valve to the gray barbed fitting near the top of the Tower. If you do not have at least 4 psi of pressure at that area of your system you will need to install the optional booster pump for the system. This booster pump will provide the needed pressure to operate the system properly. Place the booster pump near the bottom of the Tower. Cut the black hose in two pieces, allowing enough hose to connect from the multiport head to the pump and another piece to connect from the pump to the barbed fitting near the top of the Tower. Install the hoses. Plug the cord into the open outlet on the bottom of the electronic timer.
4. Connect your modified drip system to the ball valve on the Tower marked “landscape”. (see information on How to install a modified drip system).
5. Once the drip line is connected to the Tower simply follow the instructions on the side of the Tower to measure the flow rate of your individual drip system.
6. Once you know the flow rate of the system simply follow the separate instructions included with the timer to program in exactly when and for how long you want the system to come on for. This will dictate exactly how much water you will change at one time and also, how often this water change will take place.
7. Once the system is programmed and turned on you never need to touch it. It will automatically perform regular, precise water changes with no cost or effort on your part.


